
My neighbour has drilled through my wall. Now what?
Mistakes happen. Including to my neighbour, who unceremoniously created a direct line to my place with a drill. Here’s a quick rundown of how I repaired it.
My neighbour was only trying to put up a shelf. But he drilled so deep into the stud wall that the drill came out on my side. I can’t describe the exact course of events as I was actually on holiday at the time. I just received photos of the hole and a WhatsApp message from a friend telling me about it. She’d been in my apartment a few hours after it happened because I’d tasked her with watering my plants.

«I’d barely been in the apartment for two minutes when the doorbell rang. It was your neighbour out in the stairwell, wearing a towel and holding out his phone to me. He doesn’t speak very good German, so he called his friend to describe the mishap,» I hear my friend’s voice say through my phone speaker. «The neighbour’s friend told me that he made the hole while he was drilling and that – on behalf of his friend – he’s incredibly sorry. The neighbour will, of course, pay for the damage or repair the hole himself. I replied that I don’t live here, but I would let you know. Then I found a note on the floor, which he must have pushed under the door. It says that he’s sorry and includes his phone number. I’ll send you photos of everything now.»
I just laughed, enjoyed the rest of my holiday and decided to patch the hole myself when I got home. The incident definitely dented my confidence in my neighbour’s DIY skills. Not that I’m a pro, but when in doubt, I’d still prefer to screw up the repair myself.
My personal repair method
When I got home, I spotted the hole in the hallway before I’d even unpacked my travel backpack and was relieved to see that it was relatively inconspicuous. That’s why I decided to let things lie for a few days.
When I finally started work on the repair, I briefly considered buying grey repair grout for mixing. But since the hole wasn’t that big, I opted to use ready-made white filler so that I could not only save myself a lot of mess, but also the hassle of painting over the spot in question. Not to mention buying a 5-litre bucket of paint, because it’s hard to find wall paint in small containers.

After thoroughly clearing out the hole with the hand-held attachment of the vacuum cleaner, I applied a little deep-penetrating primer to prevent the filler drying out later. Alternatively, you can also dampen the hole with water, or you can start straight away with a spatula for very minor repairs. I placed the tube filled with ready-made repair compound into the hole and squeezed until the hole overflowed. Then I went over it with the spatula and smoothed everything out.

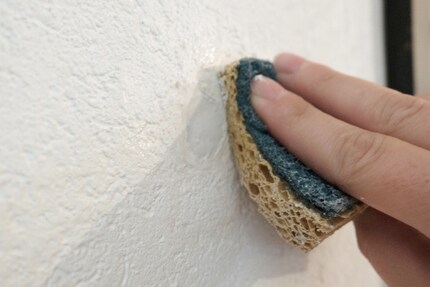
Smoothing out the filler spread it over the intact wall. I carefully cleaned around the hole with a wet sponge and removed any excess filler. The hole should be completely dry and ready for the second pass in an hour. After some quick sanding comes the trickiest task: simulating rough plaster.

We have bucketloads of it in our shop, but that's exactly the problem. I’m not going to buy litres of rough plaster to cover a 3 cm hole. The small hardware shop around the corner had no rough or textured plaster. I’ve also learned from YouTube videos that it’s not that easy to apply plaster so that it’s level with the rest of the wall. Sanding isn't an option, otherwise you'll remove all the grain. So I created texture myself.
Creating texture
I put a little more filler on the filled hole and spread it evenly with a wet finger. Then I let it start to dry and used the corner of my scraper on it (article in German). This created indentations that are as close as possible to the original plaster. At the same time, I scraped off a grain or two from the wall and added them to my patch.

When everything had dried, I was almost a little surprised at how well it had all turned out. Sure, you can see the difference, if only because the repaired area is actually white compared to the rest of the wall. But I’m still really happy with the aesthetics. Plus, I only actively worked on it for half an hour and hardly made any mess.

By the way, my relationship with my neighbour has also been patched up, or rather it was never damaged at all. What he lacks in craftsmanship, he makes up for in morals and a sense of duty. After the note and conversation with my friend, he also apologised to me personally and offered his help. I’d obviously never demand payment from anyone who acts so courteously. Or, as my father used to say to us five children: «I don’t care who it was, please just tell me if something is broken so I can fix it.»
My life in a nutshell? On a quest to broaden my horizon. I love discovering and learning new skills and I see a chance to experience something new in everything – be it travelling, reading, cooking, movies or DIY.


